The first of the Klingon Civil War OP events, Attack on Gowron sees two fleets face off trying to assassinate each others' Gowron.
Klingon ships gain a -2 points cost bonus for this OP event, and Gowron himself is free so we all expected to find many Klingon ships... We were not dissapointed!
My list for the event is as follows:
I.K.S. Maht-H'A [28]
- Kruge 7 (Captain) [4]
- - Klag [1]
- Jennifer Sisko [4]
- Nanclus [6]
Ship Total: 43 SP (41)
Klingon Starship (Vor'cha Class) [26]
- Kurn 5 (Captain) [3]
- Deanna Troi [4]
Ship Total: 33 SP (31)
Klingon Starship (Vor'cha Class) [26]
- Chang 7 (Captain) [4]
- Gowron (Admiral) [3]
- Rom [3]
Ship Total: 36 SP (31)
1st Wave Attack Fighters [24]
- Flanking Attack [3]
Ship Total: 27 SP
Fleet Total: 139 SP (130 with the minus points for using Klingon ships/cards)
Round 1 vs Klingons!
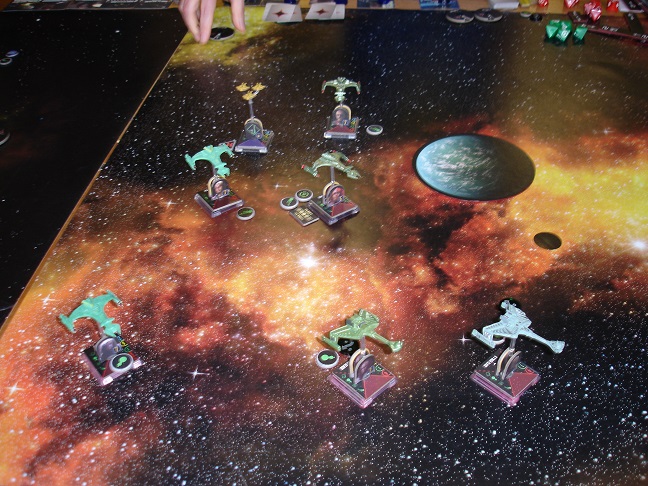
5 Klingon ships, fleet I believe was pure:
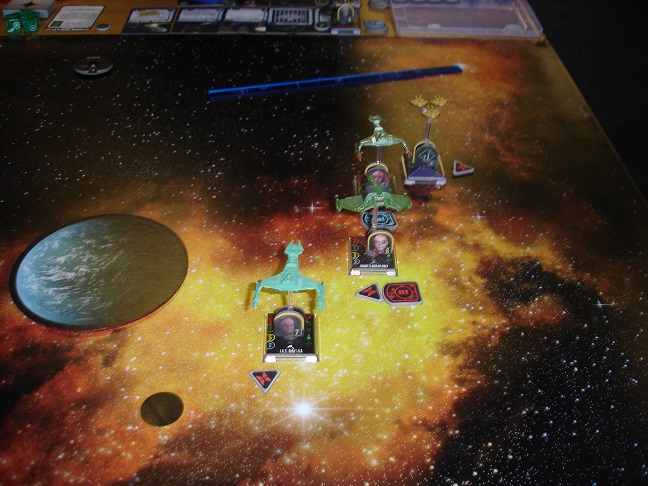
Quick shot of my fleet before we start:
Round 1: Movement, everyone who can cloak does so...
Round 2: Both fleets converge and I use Nanclus' ability to make his "Chang's Bird of Prey" (carrying his Gowron) to roll no defence dice this turn, in addition, he bumps one of his own ships with the Bird of Prey giving it no actions for the turn.
After a brutal exchange of fire, the Bird of Prey is destroyed and each of the remaining ships on both sides take damage. The surviving ships from the first volley set their manouver dials ready for the next round:
A few good calls puts the majority of my ships behind my opponents' fleet and one of his Vor'cha cruisers falls to concentrated fire. I take some hits in return from rear arc weapons on the K'Tinga's (maybe D7's... not entirely sure)...
The next round of movement sees the chase begin... After moving behind the opposing fleet, this had left me in an excellent position:
Another turn goes by and I'm starting to gain ground as my opponent runs out of game space. I manage to finish off one of the K'Tinga's this turn...
I give up on chasing the last K'Tinga and turn in towards the Vor'cha. Using Troi's ability I disable the Captain, causing the ship to decloak - both of my Vor'cha's open fire and destroy their target:
Time is called and the remaining K'Tinga remains safely outside my reach...
A nice win to start off the day... Quick picture of the victorious fleet:
So, a 115-0 win and after a pretty successful game I was looking forward to the next game.
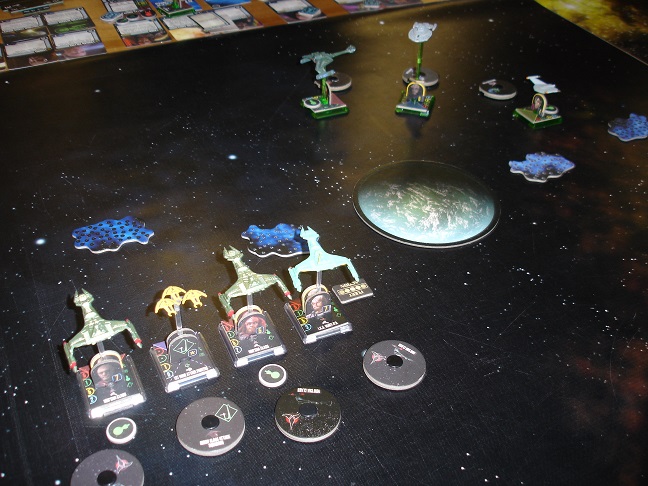
The view from my force, a Negh'var, 2x Vor'cha's and a Bird of Prey:
This game was brutal. First round of firing and I made a few errors, notably using Nanclus to give the Negh'Var an extra attack dice but as my opponent moved after me he just reactivated Gowron... epic fail on my part. The Negh'Var and one of the Vor'cha's managed to kill my ship carrying Gowron. In return, I destroyed the Negh'Var... we each lost a Vor'cha and ended up with only two ships each remaining...
This was now a very tight game. In hindsight, I made an epic mistake here.
As you can see, my opponent chose wisely. I did not. My Vor'cha took a hammering this turn, and I only managed to damage the Bird of Prey, not quite enough to destroy it...
I corrected my mistake from earlier but by now I was in a precarious position, my Hideki's had taken a bit of a bettering and I was unable to finish off any of my opponent's ships. I lost my last Vor'cha and I was now clearly on the ropes...
Dials set, time to see what I could do...
Point blank range, I lost another couple of tokens but did manage to finish off the Bird of Prey:
Next turn I managed to get behind my opponent's Vor'cha and started whittling away at it:
The next turn placed us again at point blank range, one token left and it was all down to the last couple of rolls, my opponent fired first:
A loss 140-110 but a fantastic game, one of the closest I've had and literally down to the last roll of the dice!
Last game of the day was against a mixed fleet carrying a million and four mines! I hate mines. Really hate mines...
So, the one thing I had to do was make sure that at least one of my opponent's ships died. A lot:
In fairness, the Somraw had done its job by this point and I was staring cloaked mines and nuclear mines in the face but I had some small satisfaction of eliminating it:
Dials set...
One ship lost to mines, one ship heavily damaged and the others running away...
Not a good position to be in at all...
Chang's Vor'cha was not going out without a fight however. He successfully survived a full round of attacks:
Then managed to turn around and attack himself. Unfortunately surviving two rounds was outside the realms of possibility:
Now, my turn to run:
No hope, no chance for victory here...
The Hideki's finally fell...
All in all I made a few basic errors early on and it doomed me from the moment the first mine token went down. A loss, 140-33.
Overall, 4th place and a very hard-fought series of games. Thoroughly enjoyed the day and yet again, an excellent set of opponents.
Until next time fellow gamers!
Tuesday, 24 January 2017
Saturday, 14 January 2017
Empire vs Rebels - Try-outs!
A slight change of pace today - an X-Wing game!
With the X-Wing season coming up and the Star Trek one coming to a possible end, I thought I'd give a couple of lists a run through.
List 1: Imperial:
Black Squadron Pilot + Push the limit
"Duchess" + Swarm Leader, Adaptive Ailerons, Lightweight Frame
"Zeta Ace" + Push the limit
The aim here is to keep the Black Squadron Pilots in close to the opposing force, using Zeta Ace to jump around a bit and Duchess to cause havoc on the flanks. If taken at the right time, Push the limit can be used to buff not only the TIE's offensive power with focus tokens but also evade tokens to buff Duchess with Swarm Leader.
List 2: Rebel:
Blue Squadron Pilot + Fire-control system, Mangler cannon, Proton Torpedos x2
Garven Dreis + R5-K6, Integrated Astromech
Wanted to try out a torpedo based list, in theory Dreis could pass off his focus token to one of the B-Wings each turn to give them a highly effective torpedo attack - purely a just for fun list this one.
Anyway, onto the play-through!
A quick shot of the two forces:
Initial setup:
Turn 1, movement only, no ships in range of each other:
Turn 2, both forces move into attack range:
A close view of the action:
Duchess begins the attack by using Swarm Leader and attacking "Blue 7", dealing 3 damage.
Zeta and Dreis both fail to cause any damage on their attacks, but TIE-31 scores 2 hits on Dreis at point blank range.
TIE-33 manages to score a critical hit on the now unshielded Dreis causing "Structural Damage".
"Blue 7" is unable to find its mark when attacking TIE-31, but "Blue 8" causes critical damage on TIE-33, destroying it.
Round 2 ends looking like this:
Round 3 movement:
Some excellent manouvering by Duchess (thanks to the Adaptive Ailerons) places her at range 1 behind Dreis:
After using a focus action, Duchess attacks:
Doing just enough damage to finish off Dreis, leaving the Blue Squadron members all alone. TIE-31 manages to knock off a single shield from "Blue 8". With no other ships in arc, the round was over.
Round 4 movement:
Zeta and TIE-31 both manage to score hits on "Blue 8", taking off two shields in total. "Blue 8" manages to get off a Proton Torpedo shot against TIE-31, unfortunately TIE-31 rolls an exceptional set of defence dice:
Round 5 movement:
First up to fire is Duchess, again at range 1 and using a focus token and Swarm Leader to gain an extra attack die:
5 hits on "Blue 7" is enough to finish it off, then Zeta manages to knock a single shield off "Blue 8". "Blue 8" returns fire on Zeta but is unable to score a hit.
Round 6 movement:
TIE-31 scores 2 hits on "Blue 8" eliminating the remaining shield and causing 1 hull damage. TIE-53 attacks at point blank range, scoring 3 hits and destroying the last member of the Rebel force.
So, an interesting game. The TIE-Striker's Ailerons and high skill allowed it to stay out of arc for the majority of the game, and the only time it got caught in arc it managed to eliminate the B-Wing before it could fire.
The B-Wings' Proton Torpedo and Mangler Cannon upgrades were completely ineffective, admittedly through an excellent defence roll by one of the TIE's but as soon as they closed into attack range the TIE's just stayed too close to them to be able to get to the correct range. In retrospect the points could have been better spent elsewhere, maybe on another X-Wing instead.
A few other shots of the game:
"Blue 8" faces off against TIE 31:
Duchess prepares to attack "Blue 7":
"Blue 8" finally succumbs to a co-ordinated attack from TIE-31 and TIE-53:
The surviving Imperial forces:
So, next round will be the Empire vs another amended Rebel list!
With the X-Wing season coming up and the Star Trek one coming to a possible end, I thought I'd give a couple of lists a run through.
List 1: Imperial:
Black Squadron Pilot + Push the limit
"Duchess" + Swarm Leader, Adaptive Ailerons, Lightweight Frame
"Zeta Ace" + Push the limit
The aim here is to keep the Black Squadron Pilots in close to the opposing force, using Zeta Ace to jump around a bit and Duchess to cause havoc on the flanks. If taken at the right time, Push the limit can be used to buff not only the TIE's offensive power with focus tokens but also evade tokens to buff Duchess with Swarm Leader.
List 2: Rebel:
Blue Squadron Pilot + Fire-control system, Mangler cannon, Proton Torpedos x2
Garven Dreis + R5-K6, Integrated Astromech
Wanted to try out a torpedo based list, in theory Dreis could pass off his focus token to one of the B-Wings each turn to give them a highly effective torpedo attack - purely a just for fun list this one.
Anyway, onto the play-through!
A quick shot of the two forces:
Initial setup:
Turn 1, movement only, no ships in range of each other:
Turn 2, both forces move into attack range:
A close view of the action:
Duchess begins the attack by using Swarm Leader and attacking "Blue 7", dealing 3 damage.
Zeta and Dreis both fail to cause any damage on their attacks, but TIE-31 scores 2 hits on Dreis at point blank range.
TIE-33 manages to score a critical hit on the now unshielded Dreis causing "Structural Damage".
"Blue 7" is unable to find its mark when attacking TIE-31, but "Blue 8" causes critical damage on TIE-33, destroying it.
Round 2 ends looking like this:
Round 3 movement:
Some excellent manouvering by Duchess (thanks to the Adaptive Ailerons) places her at range 1 behind Dreis:
After using a focus action, Duchess attacks:
Doing just enough damage to finish off Dreis, leaving the Blue Squadron members all alone. TIE-31 manages to knock off a single shield from "Blue 8". With no other ships in arc, the round was over.
Round 4 movement:
Zeta and TIE-31 both manage to score hits on "Blue 8", taking off two shields in total. "Blue 8" manages to get off a Proton Torpedo shot against TIE-31, unfortunately TIE-31 rolls an exceptional set of defence dice:
Round 5 movement:
First up to fire is Duchess, again at range 1 and using a focus token and Swarm Leader to gain an extra attack die:
5 hits on "Blue 7" is enough to finish it off, then Zeta manages to knock a single shield off "Blue 8". "Blue 8" returns fire on Zeta but is unable to score a hit.
Round 6 movement:
TIE-31 scores 2 hits on "Blue 8" eliminating the remaining shield and causing 1 hull damage. TIE-53 attacks at point blank range, scoring 3 hits and destroying the last member of the Rebel force.
So, an interesting game. The TIE-Striker's Ailerons and high skill allowed it to stay out of arc for the majority of the game, and the only time it got caught in arc it managed to eliminate the B-Wing before it could fire.
The B-Wings' Proton Torpedo and Mangler Cannon upgrades were completely ineffective, admittedly through an excellent defence roll by one of the TIE's but as soon as they closed into attack range the TIE's just stayed too close to them to be able to get to the correct range. In retrospect the points could have been better spent elsewhere, maybe on another X-Wing instead.
A few other shots of the game:
"Blue 8" faces off against TIE 31:
Duchess prepares to attack "Blue 7":
"Blue 8" finally succumbs to a co-ordinated attack from TIE-31 and TIE-53:
The surviving Imperial forces:
So, next round will be the Empire vs another amended Rebel list!
Monday, 19 December 2016
Search for Spock - OP Report
Hello again!
Here is my quick report for our recent OP event: The Search for Spock!
I'll say in advance that so far, the movie based OP events have been the most thematic and well thought through events that I've attended.
In this event, you build a standard 130 point fleet and add an away team booster of no more than 24 points (6 crew members).
They start the game on the Genesis planet and must not only fight to survive the opposing force but also the planet itself! In addition, deployment for this one is slightly different - one ship starts within range one of the planet and the others deploy as usual. You can use an action to lower your shields to beam aboard one crew member provided you are within range 1-2. If you are within range 1 during the end phase you may take damage, in addition your crew members left on the surface may be killed by the planet! You can also give up your attack to allow your away team to attack the opposing one.
So, only two attendees at this event (very close to Christmas so to be fair, understandable). This did give us the opportunity to try it out a couple of times though...
So, onto the fleet for this OP:
4th Division Battleship [36]
- Gul Dukat 8 (Captain) [5]
- Aft Weapons Array [4]
Ship Total: 45 SP
Dominion Starship (Jem'Hadar Battle Cruiser) [32]
- Weyoun 8 (Captain) [5]
- Gul Madred (Admiral) [5]
- Additional Phaser Arrays [6]
- Corak [2]
Ship Total: 50 SP
1st Wave Attack Fighters [24]
- Support Ship [4]
- Galor Class Phaser Banks [7]
Ship Total: 35 SP
Fleet Total: 130 SP
Ezri Tigan - 4
Deanna Troi - 3
Nanclus - 5
Remata'Klan - 4
Montgomery Scott - 5
Miles O'Brien - 2
23 SP
Back to the Dominion for this one. The combination of the Battleship handing off the action to the Cruiser just makes it such an effective combination I keep coming back to this type of build. I did want to try and avoid the "Alpha Strike" build I usually go for so did not take my Flanking Attack for my attack fighters this time - opting to use the Galor Class Phaser Banks to give them the extended range.
The away team booster I wanted to cover a range of options to account for any type of opposing force - cloaking nullifiers through to tech stealers etc.
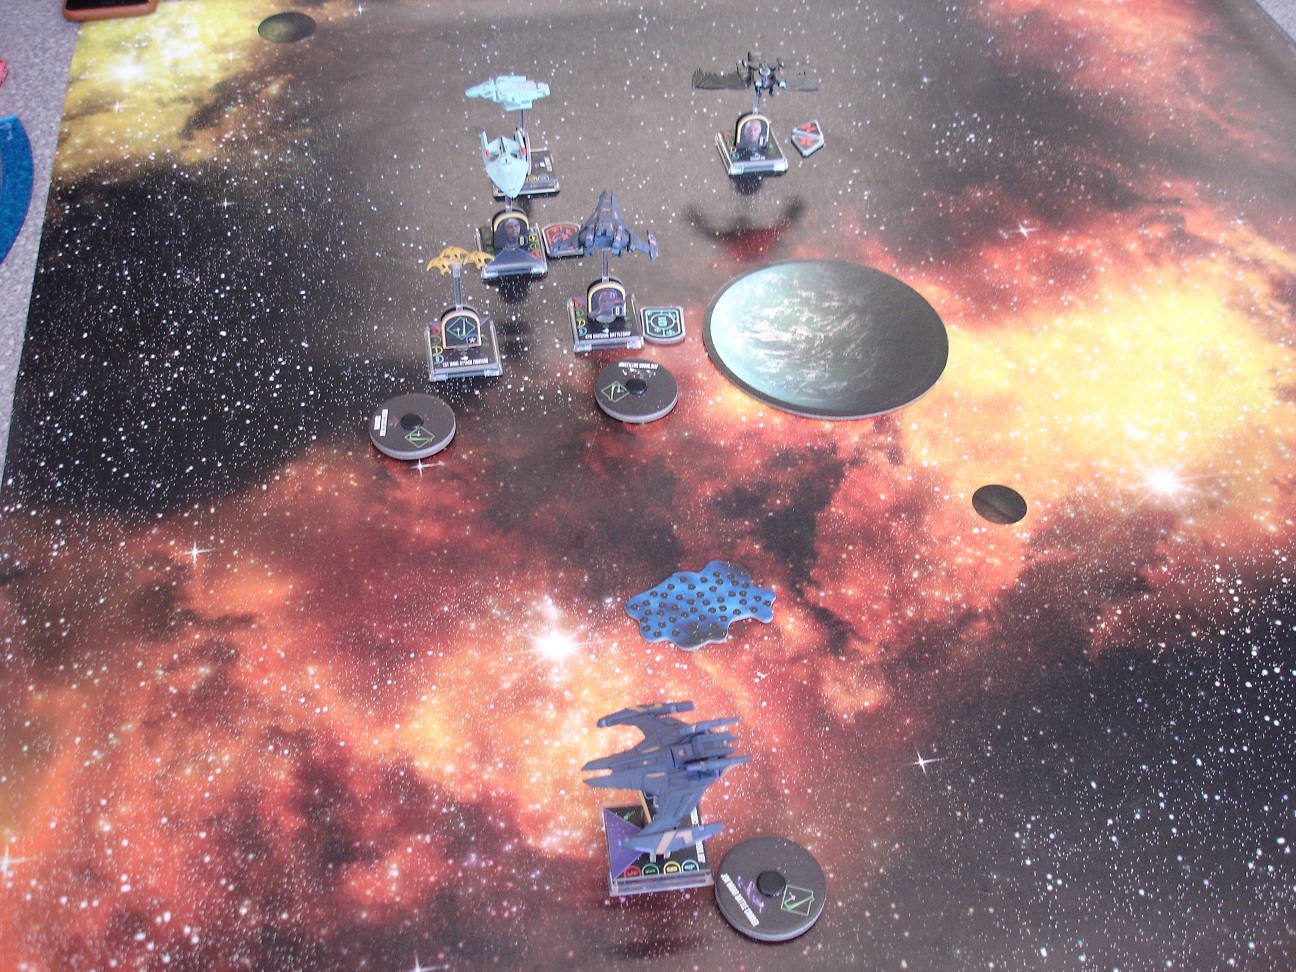
A quick shot of the two fleets:
I forgot to take a photo for the first few turns but essentially I picked up Remata'Klan with the Cruiser and flew the Battleship and 1st Wave straight at the Federation forces.
The Battleship and Cruiser teamed up to eliminate the Prometheus which reduced the effectiveness of the Equinox as Martok was no longer there to pass an action over. Shortly afterwards, my positioning of my attack fighters caused the Voyager to lose its actions putting it in a very precarious position:
A turn later the Equinox ended up bumping into Genesis:
The Genesis planet claimed its only starship victim of the day:
The next turn the Voyager managed to eliminate the Battleship but taking return fire found itself in a now untenable situation, the Voyager eventually fell to sustained fire from the Cruiser:
A well fought game, won 155-55.
After perusing my opponents list, we amended it and dropped both the Voyager and Equinox adding in the Scimitar and the Defiant... Another run through was in order. I started in the same position and as this was a play-test did exactly the same manouvers on the first turn.
The Scimitar did a 4 come about manouver and dropped Anti-matter mines on the Battleship, not doing a lot of damage but stopping my Cruiser from completing the swing-around that I had managed to complete in the previous game:
The Scimitar received an absolute hammering from the Battleship and 1st Wave but took enough of the focus away from the Prometheus and Defiant to allow them to have an unimpeded run at the Cruiser. Weyoun 8's ability stopped the Prometheus from firing at it this turn, but after an unfortunate bump into my own fighters the following turn, the Dorsal Phaser Array from the Prometheus finished it off whilst the 1st Wave eliminated the Scimitar.
Prometheus fired first, taking the Battleship down to 3 hull left, not enough. Dukat finished off Martok with a precise attack:
All that was left to do was for the 1st Wave to kill off Defiant:
Another win, 130-65. Much closer and if the Scimitar had not bothered with the mine attack early in the game I think it would have gone the other way.
In any regards, a good OP - far more thematic than the Corbomite Manouver. I like the booster idea and the planet effecting gameplay as it did was very interesting.
Kruge and his Bird-of-Prey was the prize for the OP, which both players went home with - review coming soon!
Until next time - thanks for taking a look!
The Borg Incursion
A friendly game played a few weeks ago - 400 points Borg vs 200 points Romulan and 200 points Federation...
This was a game conceived to fill in the void between OP events as a change of pace - two players on either side, co-operating to achieve a set of objectives. For the Borg team, the aim was to get as many ships off the far side of the board as possible whilst the combined Romulan/Federation fleet had to destroy or prevent this from happening.
The allied fleet would gain victory points from each Borg ship destoyed, whilst the Borg would gain a point for each ship leaving the area.
A view of the fleets:
I would be controlling the Assimilated Vessel portion of the Borg fleet (as I've never used them before the standard Borg movement scheme would have fried my brain).
The view from across the game area, firstly the Borg perspective:
The allied view:
The allied fleet had a lot of cards that were used to buff each other, such as Hayes, Donatra and Holo-Communicator. This led to the allied fleet deploying in the formation above - this would be a bloody battle. As you can see from the photo - I placed my three ships in a position to flank the opposing force whilst they contended with the cubes in the middle of the area, then hopefully be able to make a break for it when the time came.
First turn movement ended up with no-one in range:
Second turn in and the slaughter begins:
The allied fleet poured hit after hit into the cubes, eliminating Locutus' Cube and reducing the second one to a single hull point. The Queen's Diamond received a hammering but continued to stay in the fight. In return the Cubes had inflicted heavy damage on the front line ships and eliminated the Scimitar.
The Assimilation Target Prime was left unscathed and managed to drop Mutli-Kinetic Mines on top of three of the allied fleet ships.
The effect of multiple detonations was devastating. The allied fleet was cored, the remaining Borg cube was destroyed, the ATP was heavily damaged... utterly terrifying.
The following turn everyone backed away from the mines, the Voyager went after the Avatar of Tomed, the Valdore went after the Type-03...
The Voyager was destoyed shortly after. The Prometheus flew straight through the minefield, destorying both itself and the ATP.
With only the Valdore left to oppose the Borg, it was only a matter of time...
The Queen herself fired the last shot, ensuring that the remaining Borg would be free to continue their incursion:
An enjoyable game finished, the effectiveness of the mines was astonishing. Dropping the template on the three ships setting it off three times was soul-destroying. Until that point the allied fleet was making short work of the Borg and if not for that one card the game would have had a very different ending. As it was, the Federation player killed the most Borg ships, taking the moral victory.
Until next time!
This was a game conceived to fill in the void between OP events as a change of pace - two players on either side, co-operating to achieve a set of objectives. For the Borg team, the aim was to get as many ships off the far side of the board as possible whilst the combined Romulan/Federation fleet had to destroy or prevent this from happening.
The allied fleet would gain victory points from each Borg ship destoyed, whilst the Borg would gain a point for each ship leaving the area.
A view of the fleets:
I would be controlling the Assimilated Vessel portion of the Borg fleet (as I've never used them before the standard Borg movement scheme would have fried my brain).
The view from across the game area, firstly the Borg perspective:
The allied view:
The allied fleet had a lot of cards that were used to buff each other, such as Hayes, Donatra and Holo-Communicator. This led to the allied fleet deploying in the formation above - this would be a bloody battle. As you can see from the photo - I placed my three ships in a position to flank the opposing force whilst they contended with the cubes in the middle of the area, then hopefully be able to make a break for it when the time came.
First turn movement ended up with no-one in range:
Second turn in and the slaughter begins:
The allied fleet poured hit after hit into the cubes, eliminating Locutus' Cube and reducing the second one to a single hull point. The Queen's Diamond received a hammering but continued to stay in the fight. In return the Cubes had inflicted heavy damage on the front line ships and eliminated the Scimitar.
The Assimilation Target Prime was left unscathed and managed to drop Mutli-Kinetic Mines on top of three of the allied fleet ships.
The effect of multiple detonations was devastating. The allied fleet was cored, the remaining Borg cube was destroyed, the ATP was heavily damaged... utterly terrifying.
The following turn everyone backed away from the mines, the Voyager went after the Avatar of Tomed, the Valdore went after the Type-03...
The Voyager was destoyed shortly after. The Prometheus flew straight through the minefield, destorying both itself and the ATP.
With only the Valdore left to oppose the Borg, it was only a matter of time...
The Queen herself fired the last shot, ensuring that the remaining Borg would be free to continue their incursion:
An enjoyable game finished, the effectiveness of the mines was astonishing. Dropping the template on the three ships setting it off three times was soul-destroying. Until that point the allied fleet was making short work of the Borg and if not for that one card the game would have had a very different ending. As it was, the Federation player killed the most Borg ships, taking the moral victory.
Until next time!
Subscribe to:
Posts (Atom)